Here is my guide on how to import systems/hosts from cobbler.
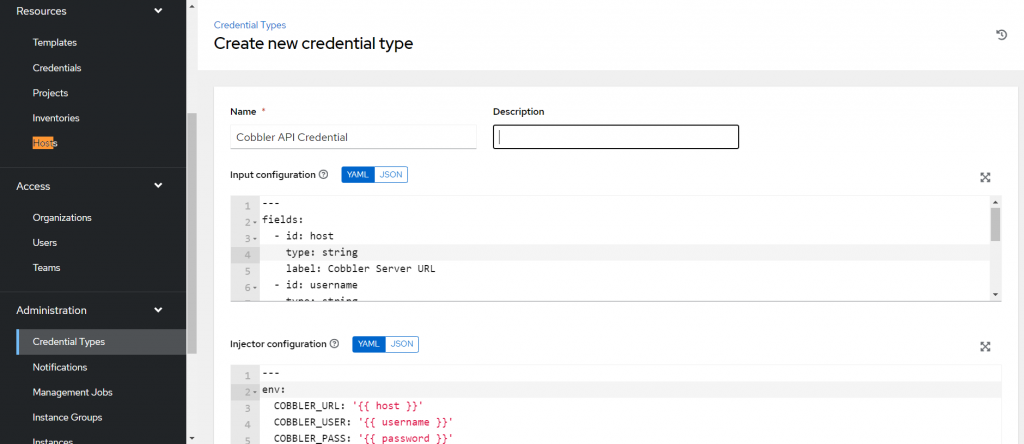
Step 1: Create a Custom Credential Type
create inventories/cobbler_inventory.py in your repo and sync the project.
#!/usr/bin/env python

import json
import xmlrpc.client
import os

# Fetch credentials from environment variables
COBBLER_URL = os.getenv('COBBLER_URL')
COBBLER_USER = os.getenv('COBBLER_USER')
COBBLER_PASS = os.getenv('COBBLER_PASS')

client = xmlrpc.client.Server(COBBLER_URL)
token = client.login(COBBLER_USER, COBBLER_PASS)

systems = client.get_systems(token)

inventory = {
    'all': {
        'hosts': [],
        'vars': {},
        'children': {}
    }
}

for system in systems:
    inventory['all']['hosts'].append(system['name'])

print(json.dumps(inventory, indent=2))
Step 1: Create a Custom Credential Type
- Navigate to the AWX Web Interface:
- Go to Administration > Credential Types and click on Add.
- Go to Administration > Credential Types and click on Add.
- Configure the Custom Credential Type:
- Name: Give your credential type a name (e.g., Cobbler API Credential).
- Description: Provide a description if needed.
- Input Configuration: Define the fields for your custom credential. Here’s an example configuration:YAML
---
fields:
  - id: host
    type: string
    label: Cobbler Server URL
  - id: username
    type: string
    label: Username
  - id: password
    type: string
    label: Password
    secret: true
required:
  - host
  - username
  - password
Injector Configuration: Define how these fields will be injected into the environment:YAML
env:
  COBBLER_URL: "{{ host }}"
  COBBLER_USER: "{{ username }}"
  COBBLER_PASS: "{{ password }}"
Save the Custom Credential Type.
Step 2: Create a Credential Using the Custom Type
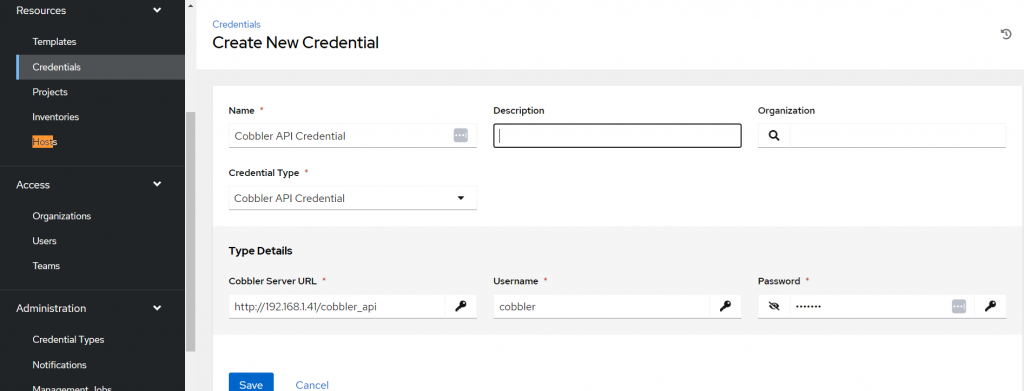
- Navigate to Credentials:
- Go to Credentials and click on Add.
- Configure the Credential:
- Name: Give your credential a name (e.g., Cobbler API Credential).
- Credential Type: Select the custom credential type you just created.
- Fields: Fill in the Cobbler server URL, username, and password.
- Save the Credential.
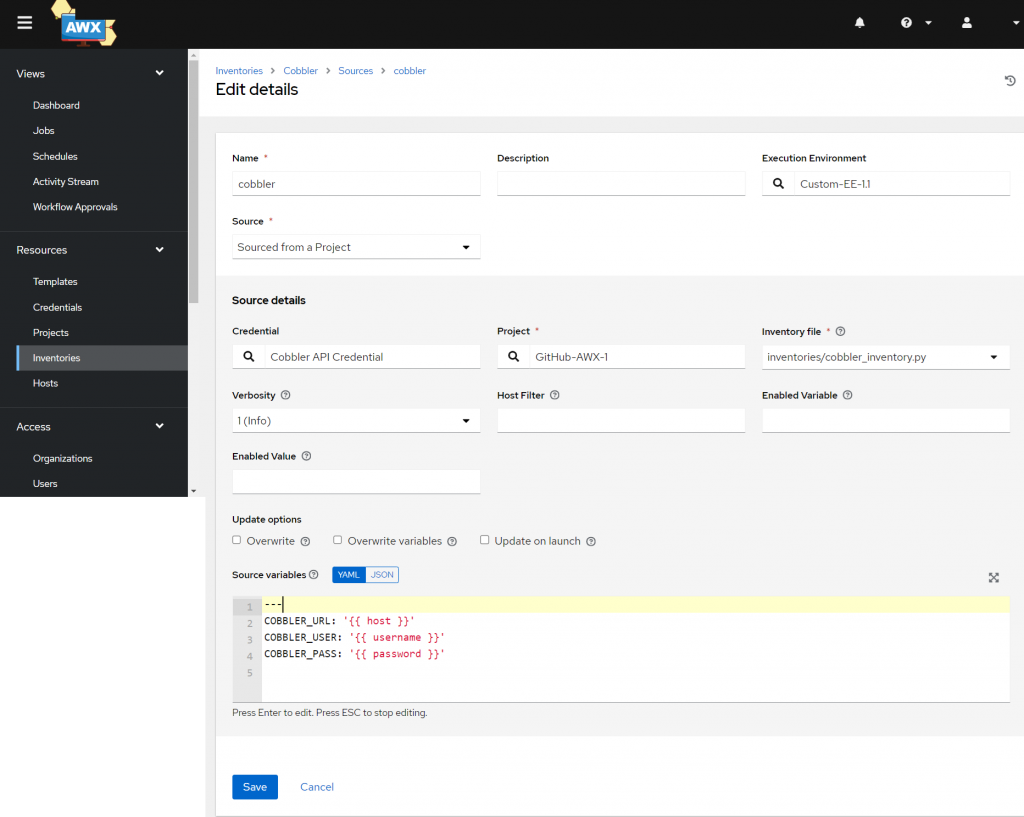
Step 3: Use the Custom Credential in Your Inventory Source
- Navigate to Your Inventory:
- Go to Inventories and select your inventory or create one for cobbler.
- Add/Edit the Inventory Source:
- Go to the Sources tab and edit your custom script source.
- Associate the Credential:
- Under Credentials, add the custom credential you created.
- Set Environment Variables:
- In the Environment Variables section, set the variables to use the credentials:JSON
{ "COBBLER_URL": "{{ host }}", "COBBLER_USER": "{{ username }}", "COBBLER_PASS": "{{ password }}" }
- In the Environment Variables section, set the variables to use the credentials:JSON
Step 4: Sync the Inventory
- Save the changes and click on Sync to fetch the inventory using the credentials stored in AWX.
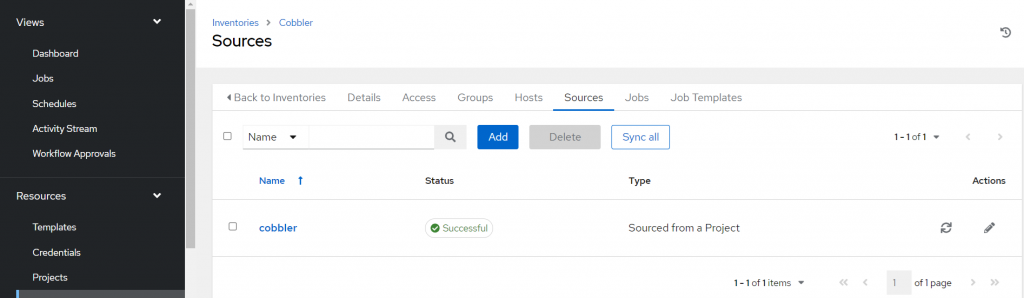
If successful, go to Hosts tab and you will see the imported hosts from cobbler.
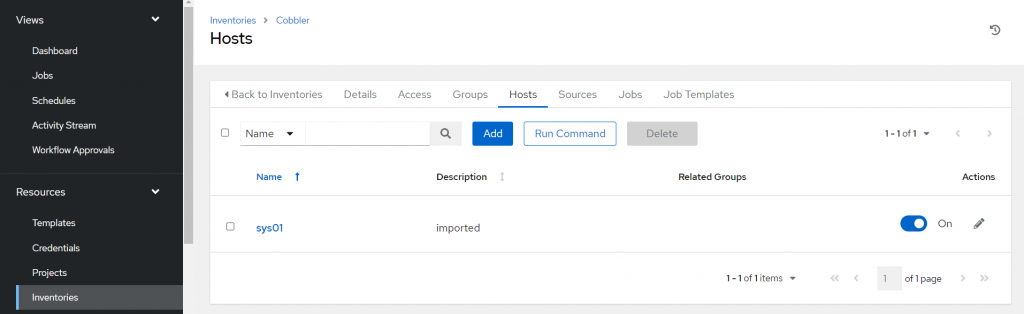
By following these steps, you can securely use AWX credentials in your cobbler_inventory.py script without hardcoding sensitive information.
Would you like more detailed steps on any of these processes or help with something else?iled steps on any of these processes or help with something else?
Example Playbook using Cobbler inventory
Create a playbook file, for example, deploy.yml
---
- name: Deploy application to Cobbler hosts
  hosts: all
  tasks:
    - name: Ensure Apache is installed
      ansible.builtin.yum:
        name: httpd
        state: present

    - name: Start and enable Apache
      ansible.builtin.service:
        name: httpd
        state: started
        enabled: true

    - name: Deploy application files
      ansible.builtin.copy:
        src: /path/to/local/app/files/
        dest: /var/www/html/
Running the Playbook in AWX
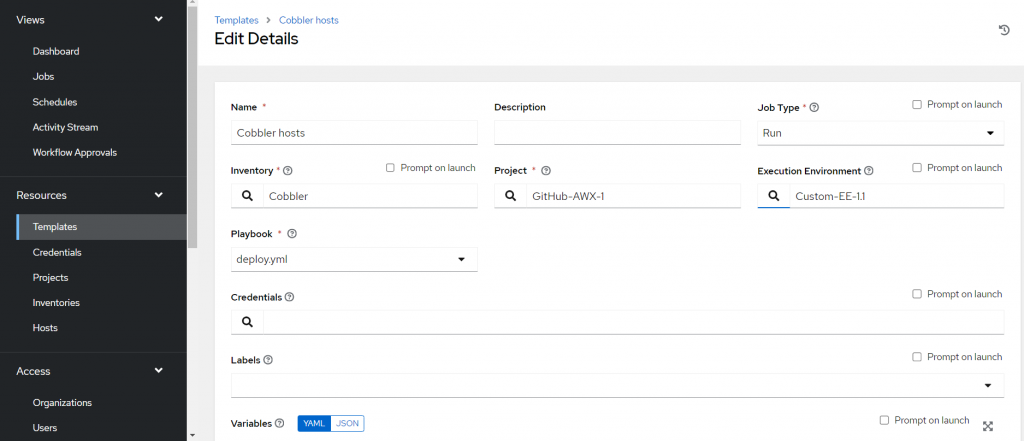
- Create a Job Template:
- Go to Templates and click on Add to create a new job template.
- Fill in the necessary details like the name, inventory (select the one with Cobbler hosts), and project.
- Select the Playbook:
- Choose the
deploy.ymlplaybook you created.
- Choose the
- Run the Job:
- Save the job template and click on Launch to run the playbook against the hosts imported from Cobbler.
Command Line Example
If you prefer to run the playbook from the command line, you can use the following command:
ansible-playbook -i inventories/cobbler_inventory.py deploy.ymlReplace /path/to/cobbler_inventory.py with the path to your dynamic inventory script.
This setup will ensure that your playbook runs against the hosts imported from Cobbler, performing tasks like installing Apache, starting the service, and deploying application files.
Leave a Reply