Ansible Execution Environment (EE) is used in AWX and Redhat Tower stack as the container that runs jobs or tasks. EE executes a virtual environment (venv) which runs in the task Pod/Container as shown below:

You can run into situations where you want to use certain ansible plugin which will require certain python dependencies and collections not included in the default EE, so you will have to create your own custom EE to include any extra dependencies needed.
Its actually fairly easy to create your custom ee, if you have the correct guide. So let’s start.
My build environment VM: 2 vCPU, 4GB ram, 60GB disk running Rocky-9.4. Please note my image buid process took about 25GB, so if you want to play around with multipe EE image build, then please have extra disk space.
Start by updating your OS and installing the requirements
dnf -y update
dnf -y install python3 python3-pip podman
pip3 install ansible ansible-builder

mkdir ~/custom-ee && cd ~/custom-ee
You can check the ansible-builder version using following command
[root@test ~]# ansible-builder --version
3.1.0
We need the following 4 files:
- execution-environment.yml -> the main file which calls/includes the other 3 files.
- requirements.yml -> list of collections you would like to include
- requirements.txt -> any python/pip module requirements
- bindep.txt -> OS requirements
[root@test custom-ee]# cat requirements.yml
---
collections:
  - name: ansible.utils
  - name: ansible.windows
  - name: awx.awx
  - name: community.aws
  - name: community.general
  - name: microsoft.ad
[root@test custom-ee]# cat requirements.txt
git+https://github.com/ansible/ansible-builder.git@devel#egg=ansible-builder
git+https://github.com/ansible/ansible-sign
ansible-lint
ansible-navigator
yamllint
six
psutil
pytest
pytest-xdist
pykerberos
requests-kerberos
pyOpenSSL
pypsrp[kerberos,credssp]
pywinrm[kerberos,credssp]
pyyaml
GitPython
awxkit
urllib3
dnspython
pyspnego
sansldap
wheel
toml[root@test custom-ee]# cat bindep.txt
git-core [platform:rpm]
python3-devel [platform:rpm compile]
libcurl-devel [platform:rpm compile]
krb5-devel [platform:rpm compile]
krb5-workstation [platform:rpm]
subversion [platform:rpm]
subversion [platform:dpkg]
git-lfs [platform:rpm]
sshpass [platform:rpm]
rsync [platform:rpm]
epel-release [platform:rpm]
unzip [platform:rpm]
podman-remote [platform:rpm]
cmake [platform:rpm compile]
gcc [platform:rpm compile]
gcc-c++ [platform:rpm compile]
make [platform:rpm compile]
openssl-devel [platform:rpm compile][root@test custom-ee]# cat execution-environment.yml
---
version: 3
images:
base_image:
name: quay.io/ansible/awx-ee:latest
dependencies:
ansible_core:
package_pip: ansible-core
ansible_runner:
package_pip: ansible-runner
system: bindep.txt
galaxy: requirements.yml
python: requirements.txt
additional_build_steps:
append_base:
- RUN $PYCMD -m pip install -U pip
append_final:
- COPY --from=quay.io/ansible/receptor:devel /usr/bin/receptor /usr/bin/receptor
- RUN mkdir -p /var/run/receptor
- RUN git lfs install --system
- RUN alternatives --install /usr/bin/python python /usr/bin/python3.11 311Once all the above files are adjusted as per our requirements, we can start with create the build.
Tags you can change accordingly. The following command has two seperate tags.
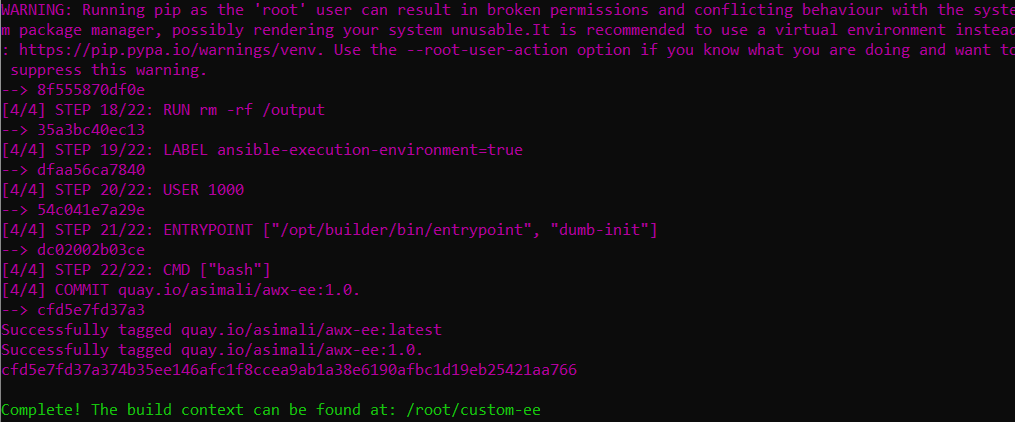
ansible-builder build --tag quay.io/asimali/awx-ee:1.0.$1 --tag quay.io/asimali/awx-ee:latest --context ./ --verbosity=3The build can take 5min or so to complete. Once completed you will see similar output.
I created a free account on https://quay.io/ – for public repositories its free.
To push / upload a image you need a username/password. Its recommended you create a different password and encrypt. Please note repository username/password are different from web login credentials.
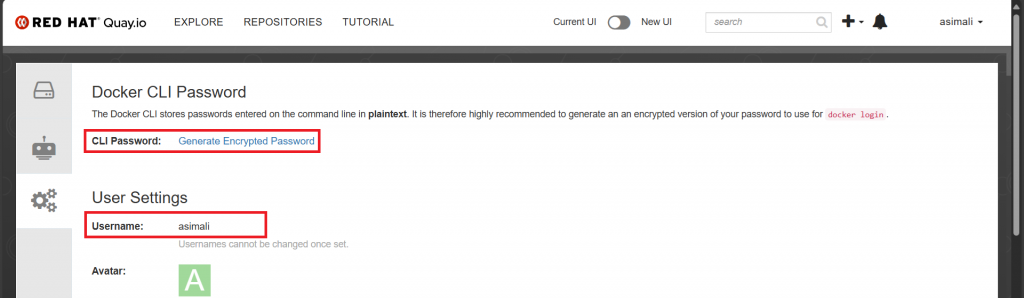
Once your credentials are ready, you can upload your image to repository.
podman login -u="yourquayrepouser" -p="yourquaytoken" quay.io

podman push quay.io/asimali/awx-ee:1.0.$1
podman push quay.io/asimali/awx-ee:latest
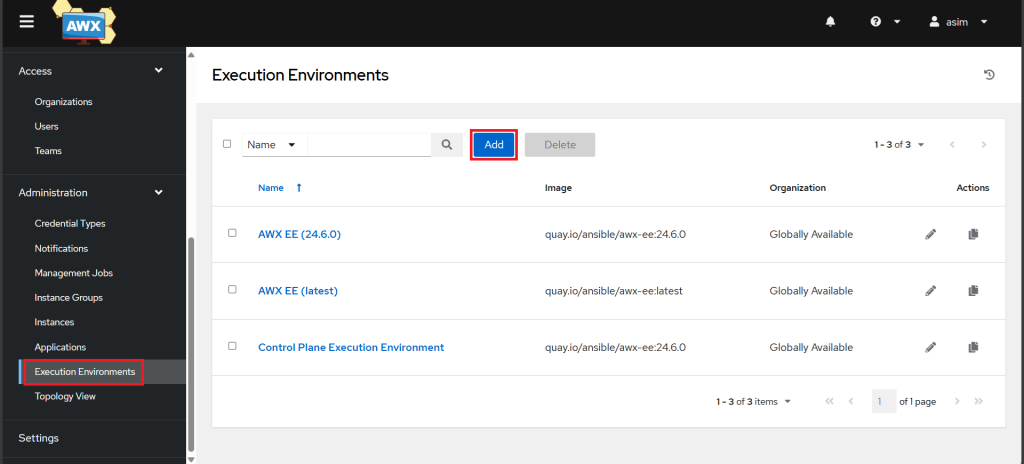
Now we need to add a new Execution environment image on AWX. Log in to your AWX UI. Click on the “Execution Environments” option on the left-hand side of the AWX UI and Click on the “Add” button to create a new execution environment.
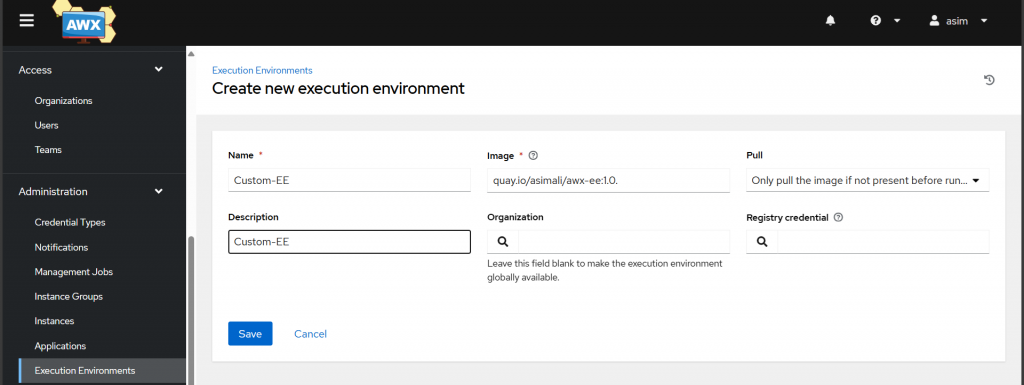
Enter the necessary details about your execution environment image, such as the name, image registry location, tag, and pull policy.
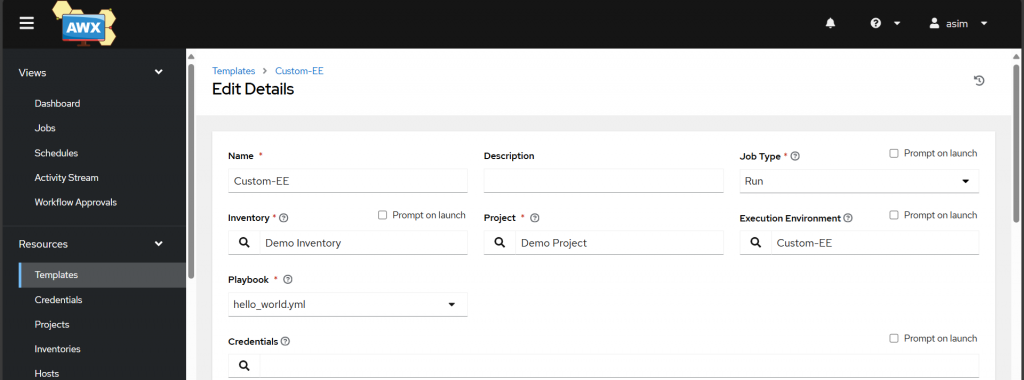
Now we can consume it via a Job Template
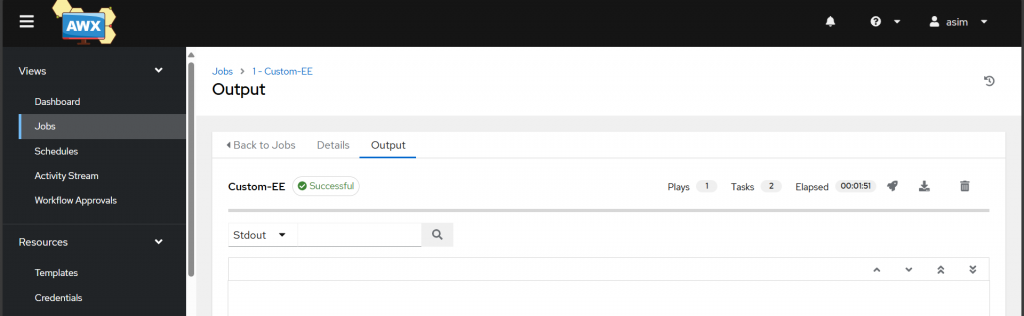
Run the job to see if its successful.
Leave a Reply